Satellite images of the .jnx format can be created directly in the SAS Planet program and now we will tell more about it.
To begin we need download the program SAS Planet. Unpack and run.
Then choose the site of interest to us.
We check the quality of satellite imagery, SAS Planet has a large selection of maps, but the main options for satellite imagery are Google Maps and Bing Maps. If these cards do not have good quality, check the following: Virtual Earth, Nokia DG satellite and slightly worse than Navteq Satellite DG, Kosmosnimki.ru, these are all different satellite images, but in some places they the same.

Load our area on the required scale, let it will be 11, 13, 19. The scale is selected depending on the quality that we need.
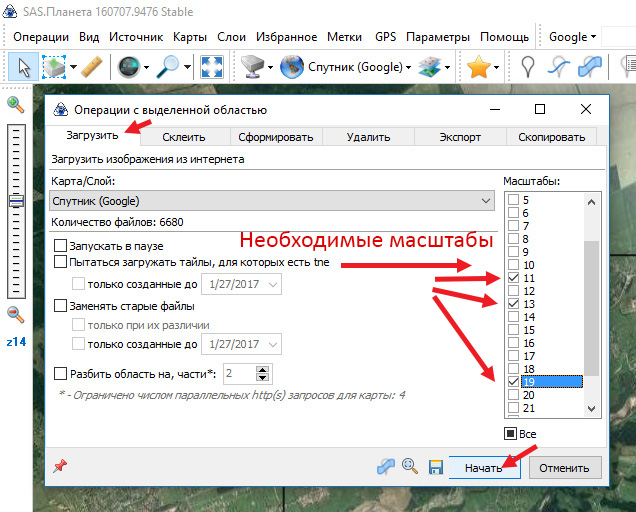
After downloading, click on the operations with the selected area and select the previous selection.

Then go to the Export tab and select the JNX raster map for Garmin. Here we select the scale and scale at which our zoomed scale will be displayed. Do not forget to check the type of the map, in our case, it’s Google maps.
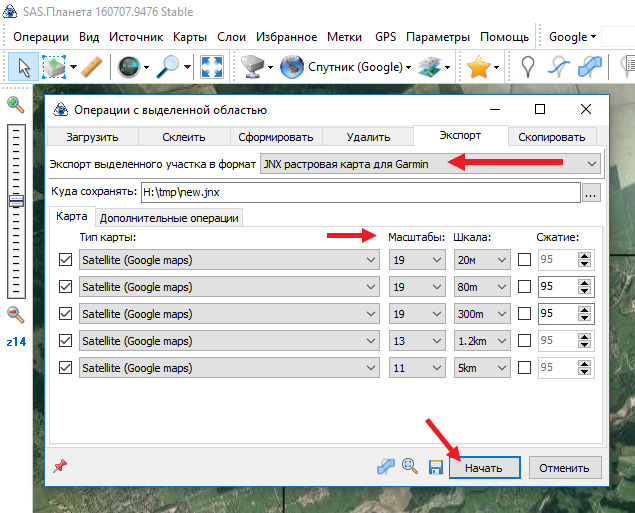
Since the most detailed picture is needed at maximum approximations, we select a scale of 19 for a scale of 20 to 300 meters. In this range, there will be a detail of the scale of 19.
To reduce the file size, you can use the scale of 18 if the detailing is suitable for your tasks. Drawing the map in the navigator will also be faster.
From 300 meters to 5 km we load the scales 11 and 13 because in this range the detailing is not important.
It is important to know:
For the fastest work of the navigator and the minimum file size, it is better to use the associated scales: 19 – 20m, 18-50m, 17-80m, 16-200m, and so on.
For example:

The example on the left side, the navigator will display a map from 20 to 120 meters with the maximum detail for its scale.
On the right side, the navigator will display from 20 to 300 meters but intermediate scales (for example 120 meters on the navigator) will be displayed on the navigator a little blurry.
Multiple file creation
To make the display as fast as possible without loss of detail and at the same time to place the entire scale of the navigator (or most of it) you need to make 2-3 files with a map, for example from 20 meters to 1.2 km, you need 2 files made with these parameters:
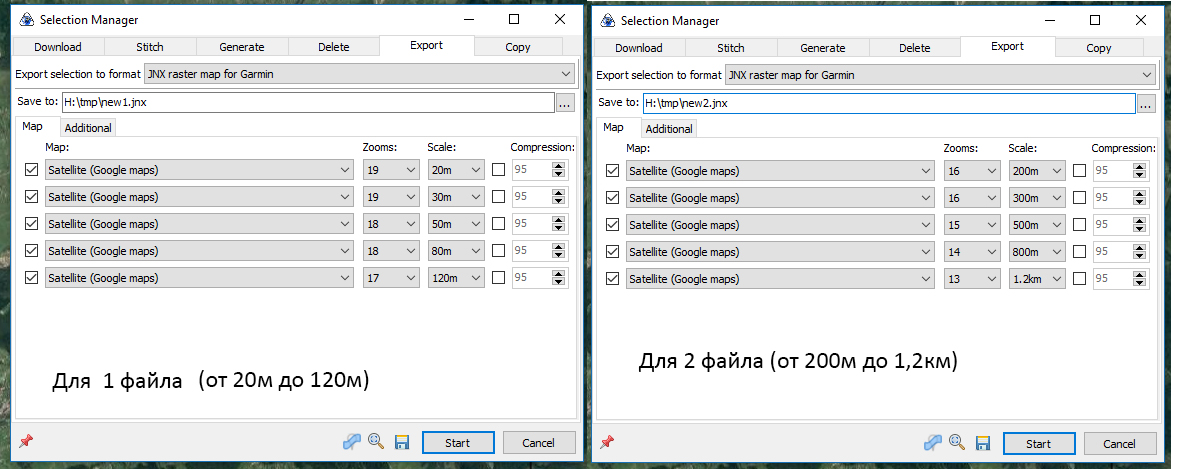
The first file will display a scale from 20 meters to 120, the second one from 200 meters to 1.2 km.
Do not forget to group these files by one ID to turn them on and off at the same time.
Use the scale 19 on a scale of 300 meters or more is not worth it, since the map will be large and terribly slow.
Choose a place to save the map.
Next, select the “Additional operations” tab

The name of the map – you can change to a more suitable one.
Name – can also be changed to your own.
Type of picture (ID) – if you want the card to be included separately from the “signature” BirdsEye cards, put an arbitrary number, for example, 20, in the future, so you can group your cards.
Version JNX – if you need to sort the rendering of maps, select the desired value for version 4, if not, leave as there is a version of the unimportant.
The compression parameter can be left as is.
After all, we press the “Start” button
In the specified folder there will be a ready JNX file, which we save to the BirdsEye folder of the navigator (which, in turn, is in the Garmin folder).
Don’t forget that the files created independently can be saved only in navigators with patched firmware, otherwise, the navigator will not start.
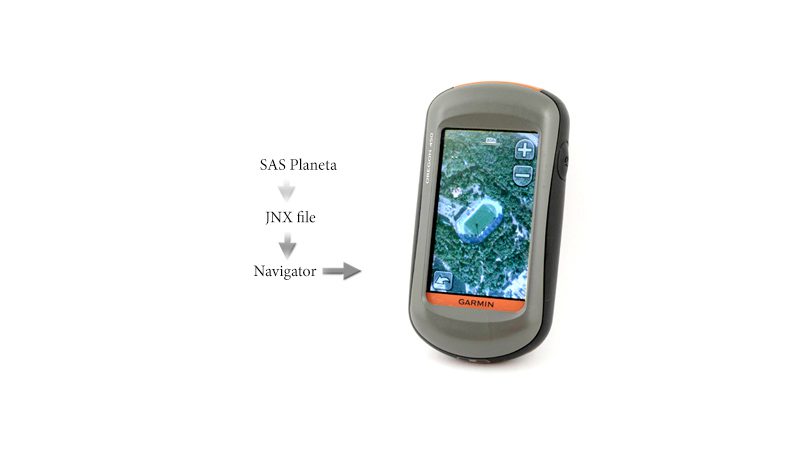
That’s what the newly created map looks like in the navigator itself.

The work of jnx created using the SAS Planet was tested on Oregon 450 and Dakota 20, the navigators read the files and displayed satellite images without problems.
As you can see creating satellite images in the jnx format have become very easy, now the main time will be spent on downloading the desired area.